Locking and securing your Mac, or any computer for that matter, is a great and effective way to protect your personal files, any sensitive information you might keep on the Mac and to prevent unauthorized access. This is especially important if you have multiple users that use the Mac or if you are often using it in public places.
Whether you’re stepping away from your desk for a few minutes or securing your Mac remotely, knowing how to lock your Mac properly ensures your privacy and keeps your data safe. With that being said, I’m going to share various methods to lock your Mac manually, automatically and even remotely. I’ll show you to use keyboard shortcuts to system preferences to keep your Mac safe.
Using Keyboard Shortcuts
Keyboard shortcuts are the fastest way to lock your Mac without navigating through menus.
Lock Screen Shortcut
- Control + Command + QThis shortcut instantly locks your screen, taking you to the login window. Your apps and files remain open in the background, but your Mac requires a password or authentication to access them again.
Put Mac to Sleep Shortcut
- Command + Option + Power (for Macs with a dedicated Power button)
- Command + Option + Eject (for older Macs with an Eject key)
Putting your Mac to sleep effectively locks it while also conserving power. Depending on how you have the system configured, you might need to enter your password when waking up the system (we’ll cover this in section 2).
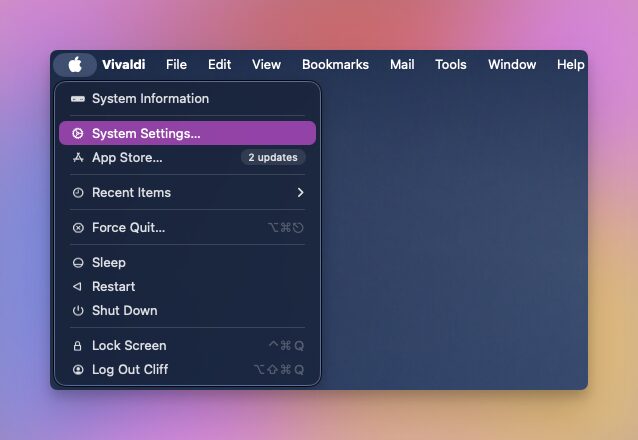
Using The Apple Menu
You’ll find this in the upper left hand corner of the screen. This only takes two clicks and is super easy and simple to use to secure your Mac.
- Click the Apple logo
- From this menu click on Lock Screen
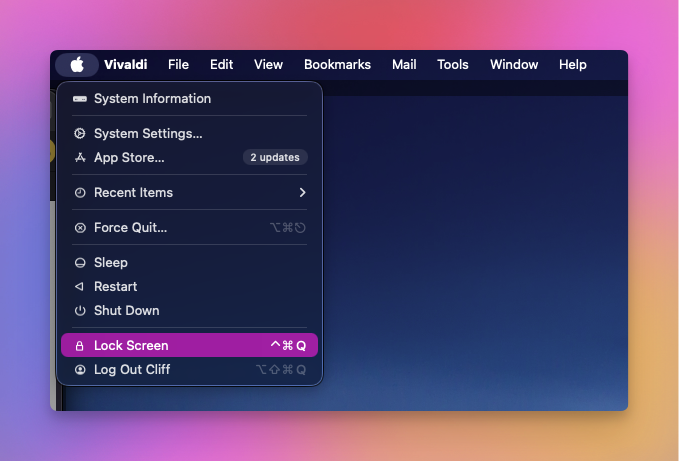
This is no different from the keyboard shortcut method mentioned above. It will require you to enter your password to unlock the system assuming you have it setup that way.
Automatically Lock Your Mac
It’s easy for any and all of us to forget to lock our Mac’s at times. It’s just how we are as humans. That’s why I prefer the method of automatically locking my Mac, so that if/when I do forget, it’ll do it for me.
Enable Screen Saver With Password
Using the screen saver can double as a security feature which is very handy and often displays something nice on your screen after a short period of time of inactivity. Again, if setup correctly, this will require you to enter your password to get back into the system, making it yet another secure way of locking your Mac.
This only takes a few simple steps to setup, and again, it’s my preferred way of securing my Mac, mainly because I’m the only user on my Mac and I often have to move away from it quickly while working on another system.
To enable the screen saver locking method, we’re going to follow the steps below.
Open System Settings
Click on Lock Screen in the left panel
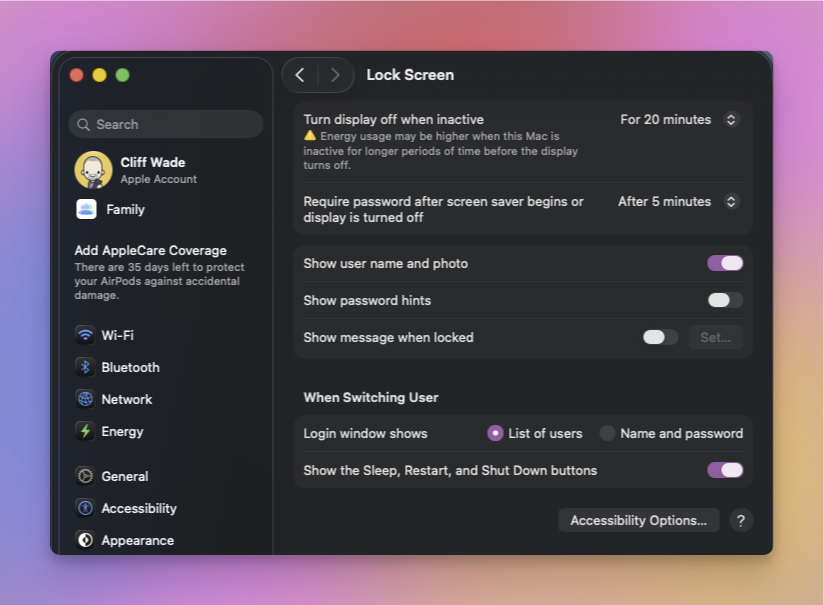
Set your preferred time interval of inactivity in which you want the screen saver to start
Enable the Require Password Immediately after screen saver or sleep begins option
Setup Automatic Lock After Screen Goes To Sleep Or The Screen Saver Begins
- Go to System Settings
- Click on Lock Screen in the left panel
- Click the Require Password After Sleep Or Screen Saver Begins option and set it to Immediately
This method guarantees that if your Mac goes to sleep automatically or you close the lid(if you’re using a MacBook), the device will lock automatically and will require you to enter your password or Touch ID to wake up the system.
Using Hot Corners To Lock Your Mac
The Hot Corners feature in MacOS is super handy and allows you to do a lot of things by simply dragging your mouse to various corners of the screen. This means you can do this to activate your screen saver which of course will lock your Mac if setup properly.
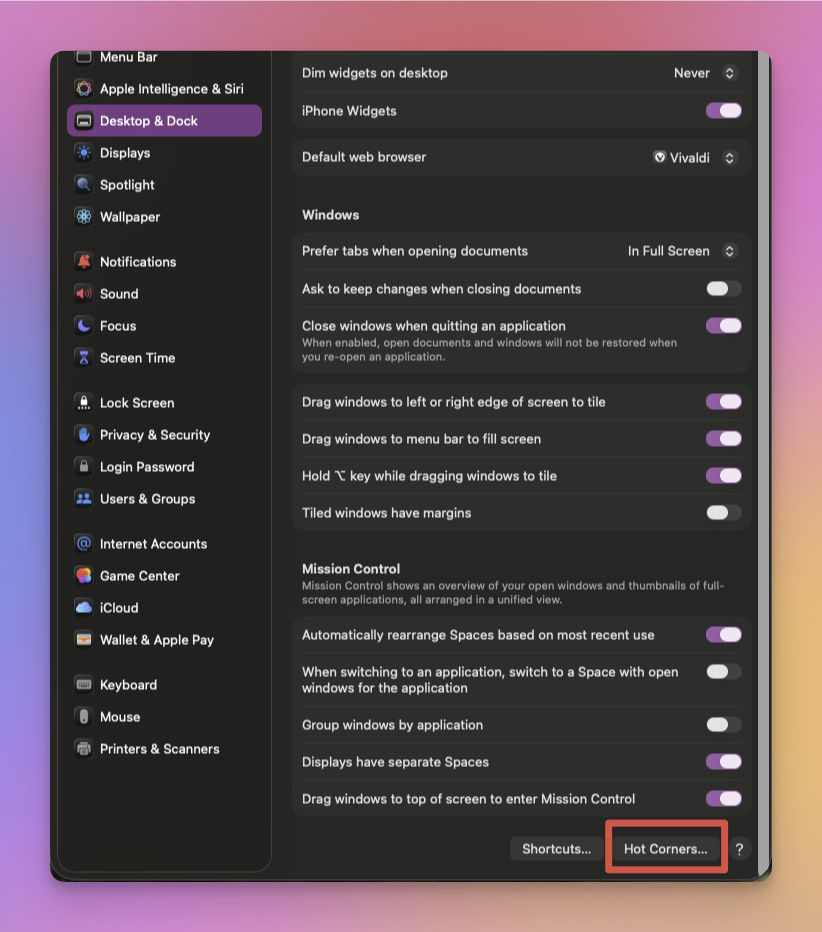
Open System Settings
Click on Desktop & Dock in the left panel
Click on Hot Corners
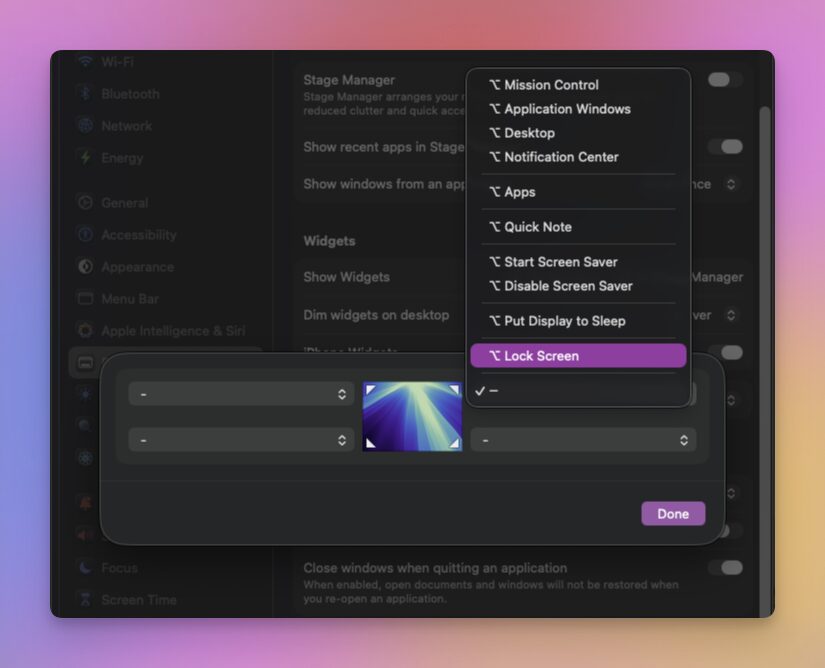
Choose a corner that you prefer and select Start Screen Saver
Click Done to save
Lock Your Mac Using Find My Mac
This is a method I’ve never used and hopefully will never have to use. This is more for if/when your Mac is lost, stolen or simply left behind in a place you can’t get back to very quickly. This of course does require the Find My Mac to be enabled on the Mac.
Find My Mac is part of Apple’s broader Find My network – a security and tracking feature built into macOS, iOS, and iPadOS. It allows you to locate, lock, or erase your Apple devices remotely using iCloud. The feature uses a combination of Wi-Fi signals, Bluetooth beacons, and Apple’s vast network of devices to track lost or misplaced products, even when they are offline (if you’ve enabled the Find My network).
When you lock your Mac remotely with Find My Mac:
- The Mac becomes inaccessible to unauthorized users
- Your personalized lock screen message is displayed
- You can track its location through iCloud
- You have peace of mind knowing your data is protected
To enable the Find My Mac option, you’ll need to follow the steps below.
- System Settings
- Apple ID
- iCloud
- See All
- Enable Find My Mac
- Allow Find My Network for offline tracking(not mandatory, but highly recommended)
Another way to lock your Mac remotely using the Find My option is to visit the iCloud website and do it from there.
- Visit iCloud.com
- Login with your Apple ID
- Choose the Mac from the list you wish to lock
- Click the Lock option
- Follow the prompts to set a passcode and optional message
Doing this will lock your Mac remotely and will force anyone who is in possession of the device to be required to enter the password to access it. One thing to note here is, even if the Mac is offline, the lock command will activate as soon as the device connects itself to the internet.
Does Closing The Lid Lock Your MacBook?
This all depends on your settings and what you’ve chosen, or not chosen. You can ensure the Mac automatically locks when closing the lid by follow the steps below.
- Open System Settings
- Click Lock Screen in the left panel
- Enable the Require Password After Sleep Or Screen Saver Begins is set to Immediately
As was the case above, if you enable this method, the MacBook will lock automatically and will required the password to be used to unlock it. One important thing to note here is if you are using your MacBook with an external display and in Clamshell Mode, closing the lid may not lock the system automatically. It’s encouraged that you get into the habit of locking the screen via other manual methods to ensure protection of your MacBook.
Final Thoughts
Locking and securing your Mac and/or MacBook is something everyone should get into the habit of as it will protect your personal data and other things. There are multiple options as I listed above, and there are likely many other ways you can lock the Mac quickly and easily enough.
I also recommend you setup both manual and automatic locking methods along with using strong passwords and file encryption to ensure your Mac is secure as possible.
If you have other methods not listed here, please feel free to drop a comment below and give me the steps of what you do. I’m always interested to learn new methods since I am still relatively new to the Mac world myself.
Comments